LS Pay Service Setup Instructions
In this article
Changing settings after installation
System Requirements
- Windows 10 or later
- .NET 8.0 Runtime:
- .NET Desktop Runtime (x86)
- ASP.NET Core Runtime (x86)
Installer
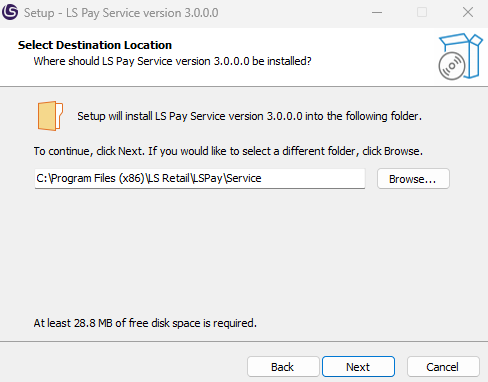
- Launch the LS Pay Service installer.
- Click Next. The default installation directory is C:\Program Files (x86)\LS Retail\LSPay\Service, change this if needed.
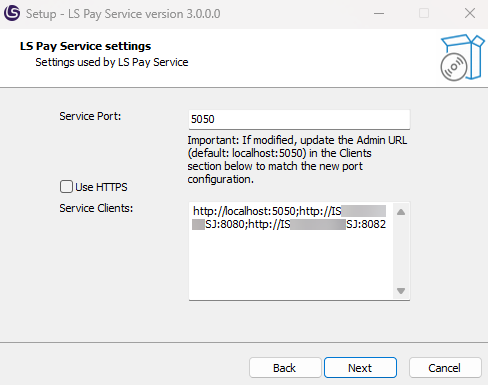
- Click Next. The Service Setting page allows you to configure the following settings:
- Service Port: Default is 5050
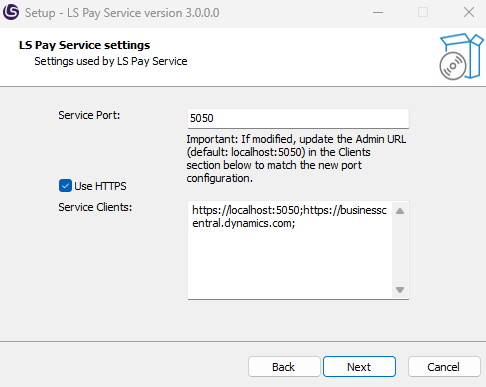
- Use HTTPS: Enable for secure connections
- This will require a SSL certificate setup.
- Note: HTTPS is required to communicate with Business Central running as SaaS.
- Service Clients: Configure client endpoints that can access the service
- Default:
http://localhost:5050;http://<computername>:8080;http://<computername>:8082http://<computername>:8080;http://<computername>:8082are the default endpoints required for on-premise installations of Business Central. This can be removed or edited if needed.- Note for Business Central Saas: Make sure to add the URL where Business Central will be running.
- Must include
<http or https>://localhost:<Service Port>for LS Pay Service admin portal access - Update protocol of clients (http/https) to match HTTPS (on/off) setting
- Default:
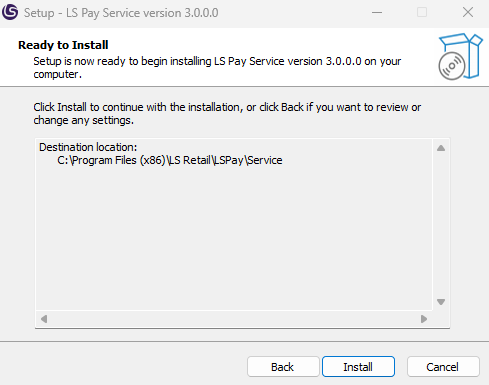
-
If HTTPS is disabled, click Next and then Install.
-
The following instructions only apply if HTTPS is enabled.
-
Click Next.
-
Certificate Settings (Only shown if HTTPS is enabled)
For HTTPS communication, you need to set up the certificate the LS Pay Service should use.
- Certificate Subject: Subject name of your SSL certificate
- Certificate Store: Choose between:
My(Personal)Root
- Store Location: Choose between:
LocalMachineCurrentUser
- Allow Invalid Certificates: Enable for self-signed certificates
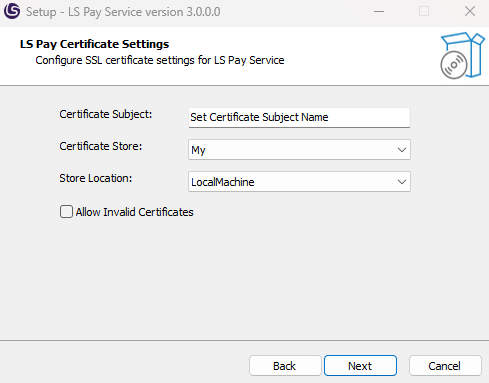
- Click Next and then Install
Changing settings after installation
To change the settings configured during installation after installation is completed, open the installation folder (Default C:\Program Files (x86)\LS Retail\LSPay\Service) and open appsettings.json.
- It should look like this (HTTP installation example):
{
    "Logging":
    {
        "LogLevel":
        {
            "Default": "Information",
            "Microsoft": "Warning",
            "Microsoft.Hosting.Lifetime": "Information"
        }
    },
    "LSPay":
    {
        "Clients": "http://localhost:5050;http://<computername>:8080;http://<computername>:8082",
        "LogCleanupIntervalInDays": 7
    },
    "Kestrel":
    {
        "Endpoints":
        {
            "Http":
            {
                "Url": "http://*:5050"
            }
        }
    }
}
LS Pay Service configuration
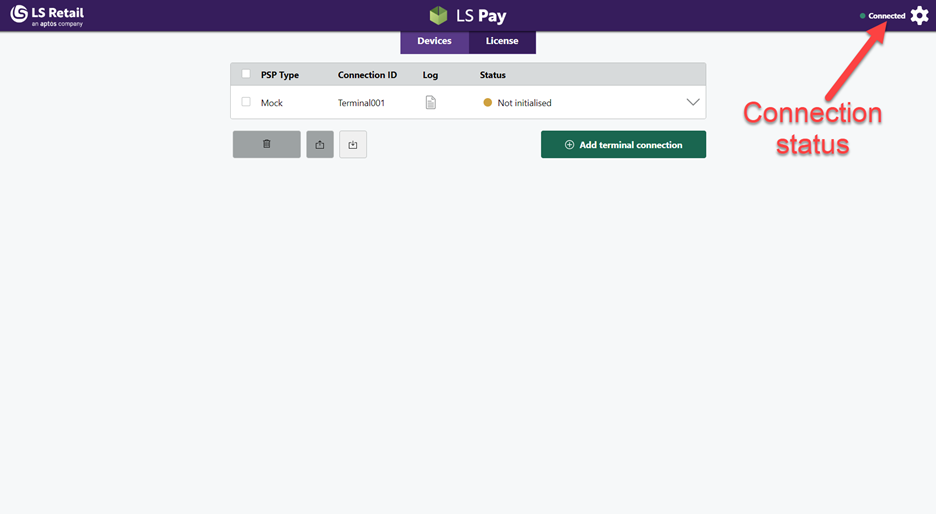
To configure the LS Pay Service, open a browser and type in localhost:[port]/Admin.
- This opens the LS Pay Service Admin UI.
If the Service is running on the same machine, then a connection to the Service should already be established.
- The connection status is displayed in the top right corner of the Admin UI.
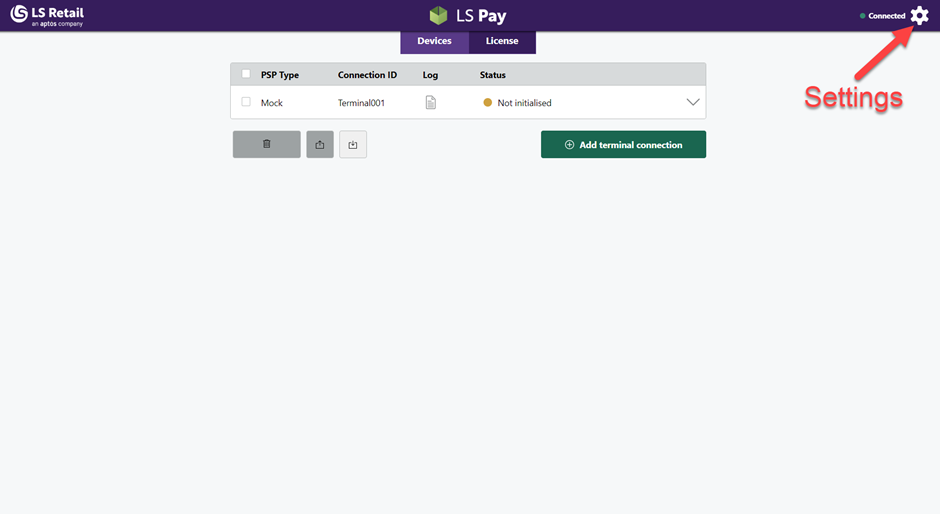
LS Pay Service settings
Open the settings by clicking on the wheel in the top right corner.
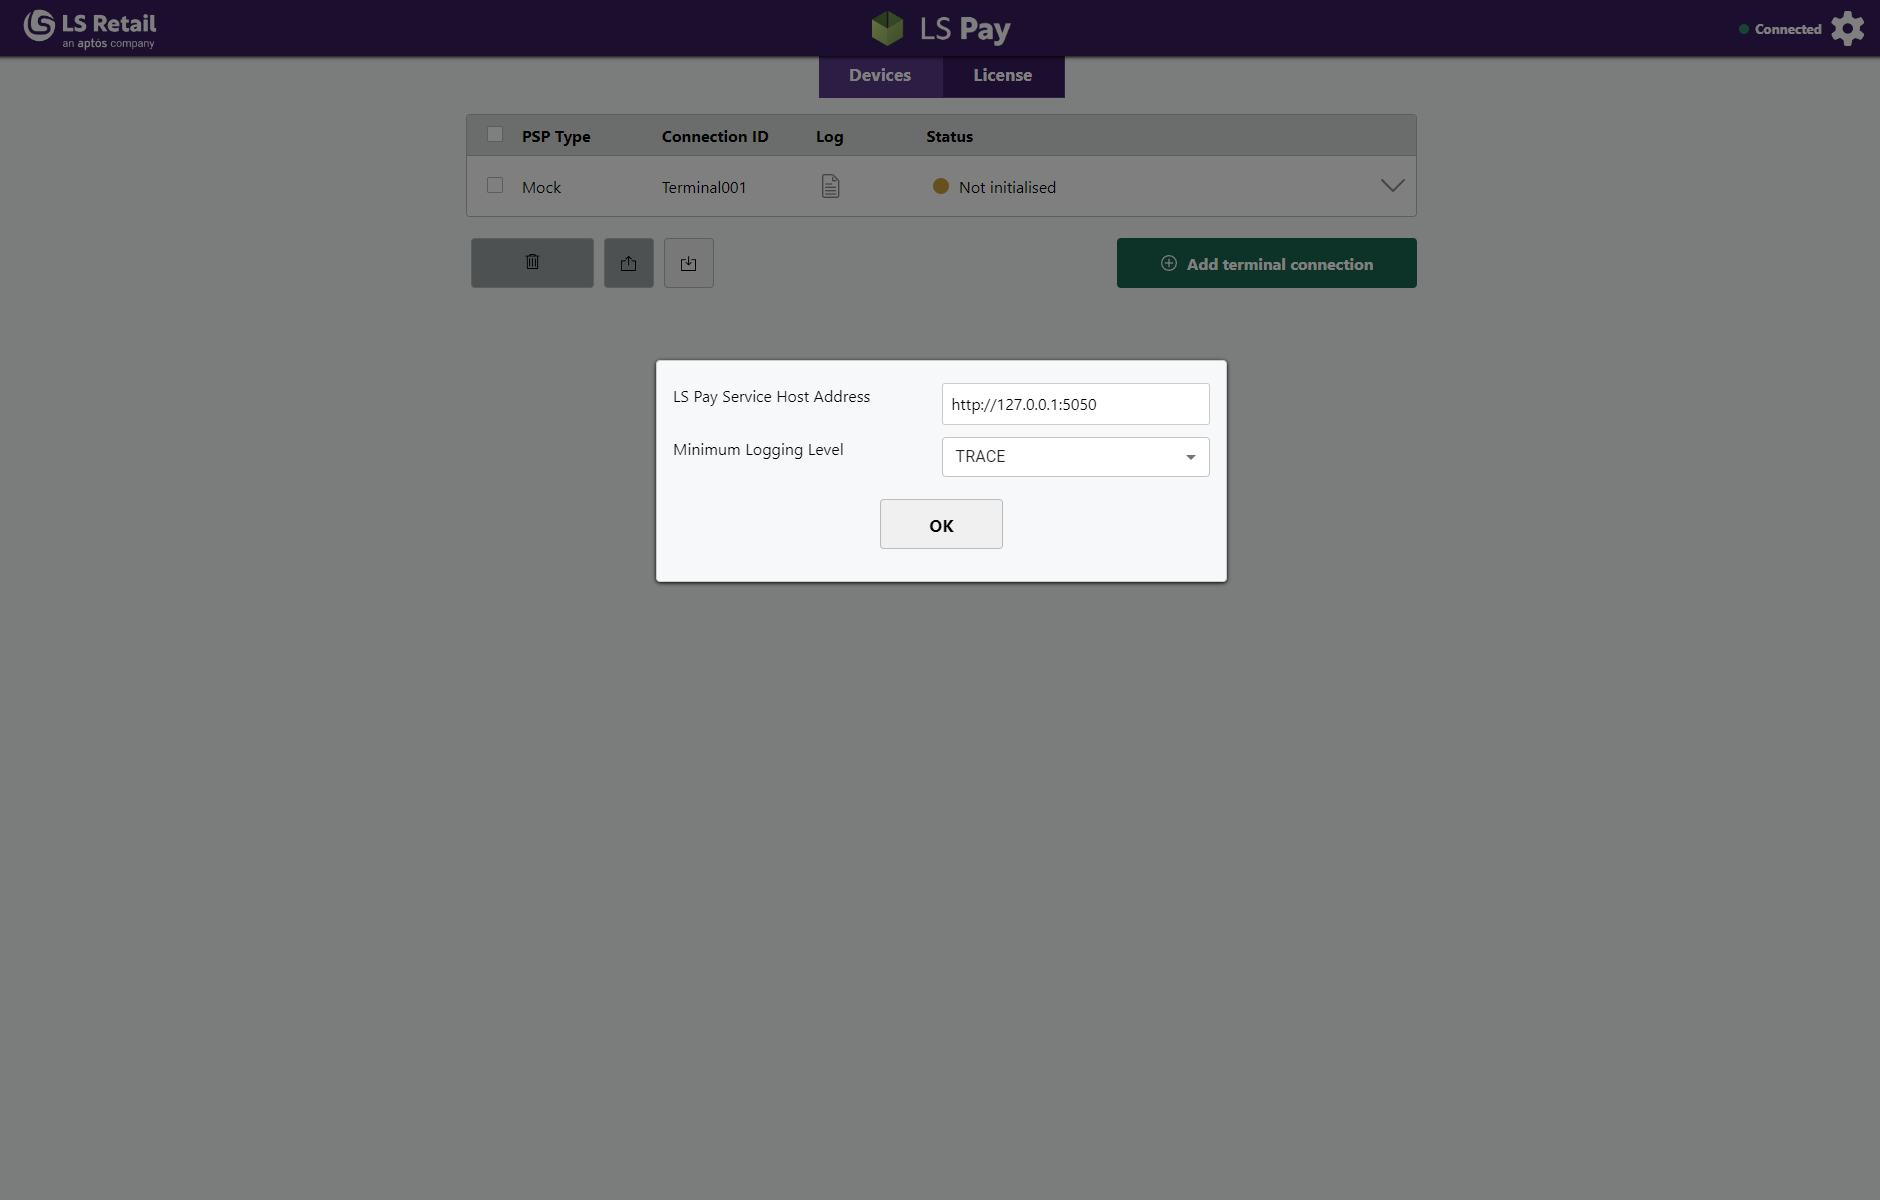
If the LS Pay Service is running on a separate machine, there are settings that need to be configured to establish a connection with the Service.
Input the address and port where the LS Pay Service is hosted.
- The default port is 5050.
- If the LS Pay Service was set up to use HTTPS, make sure to set the URL to start with https:// instead of http://.
- After changing the settings, press OK and refresh the page to see if a connection has been established.
If the LS Pay Service is running on the same machine, the IP Address can be left as is.
-
The port number should be the same as set during installation, the default port is 5050.
-
If the LS Pay Service was set up to use HTTPS, make sure to set the URL to start with https:// instead of http://.
-
Refresh the page to see if a connection has been established.
-
After changing the settings, press OK and refresh the page to see if a connection has been established.
Note: In the settings window it is also possible to set the minimum logging level for terminal connections.
License Activation information